Introduction to Old-Fashioned Homemade Banana Pudding
When it comes to comfort desserts, few dishes evoke nostalgia quite like old-fashioned homemade banana pudding. This delightful treat has been a staple in many American households for generations, cherished for its creamy texture, sweet banana flavor, and the delightful crunch of vanilla wafers. But why has this dessert stood the test of time and maintained its place in our hearts?
Why Banana Pudding is a Timeless Classic
Old-fashioned homemade banana pudding is more than just a dessert; it’s a sentiment, an experience that transports you back to the simple joys of childhood. With its origins tracing back to the 19th century, this classic pudding has evolved yet stayed true to its roots. Here are a few reasons why this dish remains a favorite:
-
Easy to Make: The simplicity of this recipe is part of its charm. With just a handful of ingredients—ripe bananas, vanilla pudding, and those essential vanilla wafers—you can whip up a delightful dessert that captures the essence of home-cooked nostalgia. You can explore variations and guide yourself through the process with resources like Epicurious for more inspiration.
-
Perfect for Any Occasion: Whether you’re hosting a casual gathering or celebrating a holiday, banana pudding is a crowd-pleaser. Its rich, creamy flavor makes it suitable for both warm summer evenings and cozy winter get-togethers.
-
Quality Ingredients: The dish allows for flexible, high-quality ingredients, contributing to its timeless status. Fresh bananas, homemade pudding, and even turkey bacon or chicken ham options for savory pairings enhance its appeal. In fact, the USDA emphasizes the benefits of consuming fresh fruit as part of your diet, making your pudding a guilt-free indulgence.
Here’s a thought: Have you ever made banana pudding with a twist? You might want to try adding a hint of espresso for a unique flavor profile that will impress your guests. Nothing beats that first cool, creamy bite!
In the following sections, we’ll dive deeper into the joys of preparing old-fashioned homemade banana pudding, sharing tips, tricks, and personal anecdotes to ensure your dessert creation is as delightful as the memories it evokes. Stay tuned!
Ingredients for Old-Fashioned Homemade Banana Pudding
Essential ingredients you’ll need
When preparing your old-fashioned homemade banana pudding, it’s all about quality and simplicity. Here’s what you’ll need to gather:
- Ripe bananas: Choose bananas that are just beginning to spot—this ensures maximum sweetness.
- Vanilla wafers: These classic cookies add delightful crunch and absorb moisture perfectly.
- Milk: Whole milk is ideal for a creamy texture, but feel free to use alternatives based on dietary preferences.
- Granulated sugar: For sweetness, just the right amount ensures the balance you crave.
- Cornstarch: This thickening agent will give your pudding that luscious, velvety consistency.
- Eggs: Use large eggs; they bring richness and help set the pudding.
- Vanilla extract: A splash enhances the flavor beautifully; pure extract is best!
Optional ingredients for extra flavor
Want to elevate your old-fashioned homemade banana pudding? Consider adding:
- Heavy cream: Whipped cream on top adds decadence.
- Coconut flakes: These lend a tropical twist reminiscent of summer days.
- Nutmeg or cinnamon: A pinch can add warmth and depth to your dessert.
- Peanut butter: Swirl in some creamy peanut butter for an unexpected flavor hit.
Experimenting with these options can turn a classic dish into something uniquely yours! And don’t hesitate to explore more about these elements at Serious Eats for expert insights.
Step-by-Step Preparation of Old-Fashioned Homemade Banana Pudding
Old-fashioned homemade banana pudding has a reputation for being a nostalgic dessert that many of us cherish from childhood. It’s creamy, sweet, and so wonderfully simple to make. Let’s dive into the step-by-step preparation that will have you savoring the flavors in no time!
Gather Your Ingredients
Before you embark on making this delicious dessert, it’s essential to gather all your ingredients. Having everything ready to go not only creates a more enjoyable cooking experience but also ensures you won’t forget a key component. Here’s what you’ll need:
- 3 to 4 ripe bananas: Choose bananas that are slightly speckled for the best flavor.
- 1 cup granulated sugar: Sweetness is key in this classic recipe.
- 1/2 cup all-purpose flour: This will help thicken your pudding.
- 1/4 teaspoon salt: Balances the sweetness.
- 2 3/4 cups whole milk: Full-fat milk yields a richer pudding.
- 3 large egg yolks: Adds creaminess and flavor.
- 1 tablespoon vanilla extract: For that classic taste.
- 1 tablespoon unsalted butter: This enhances the richness.
- Vanilla wafers: Essential for layering!
- Whipped cream: For the perfect topping (store-bought or homemade).
Once you have all your ingredients in front of you, it’s time to start creating your old-fashioned homemade banana pudding.
Prepare the Pudding Mixture
In a medium mixing bowl, start by whisking together the sugar, flour, and salt. This will help prevent any lumps when you combine your dry and wet ingredients later. Next, in a separate bowl, whisk the egg yolks and then slowly mix in the milk until everything is combined thoroughly. If you’re seeking a deeper understanding of the science behind thickening agents like flour and eggs in custards, check out resources like America’s Test Kitchen.
Combine and Cook the Pudding
Now it’s time to combine everything. In a saucepan over medium heat, whisk the sugar mixture into the milk and egg yolk mixture. Continually stir as it cooks, allowing the mixture to thicken. This should take about 10-15 minutes. You’re looking for a creamy pudding consistency that coats the back of a spoon. Once thickened, remove it from the heat and stir in the vanilla extract and butter. The butter will melt beautifully into the warm pudding, enhancing the flavor.
Layer Your Pudding and Bananas
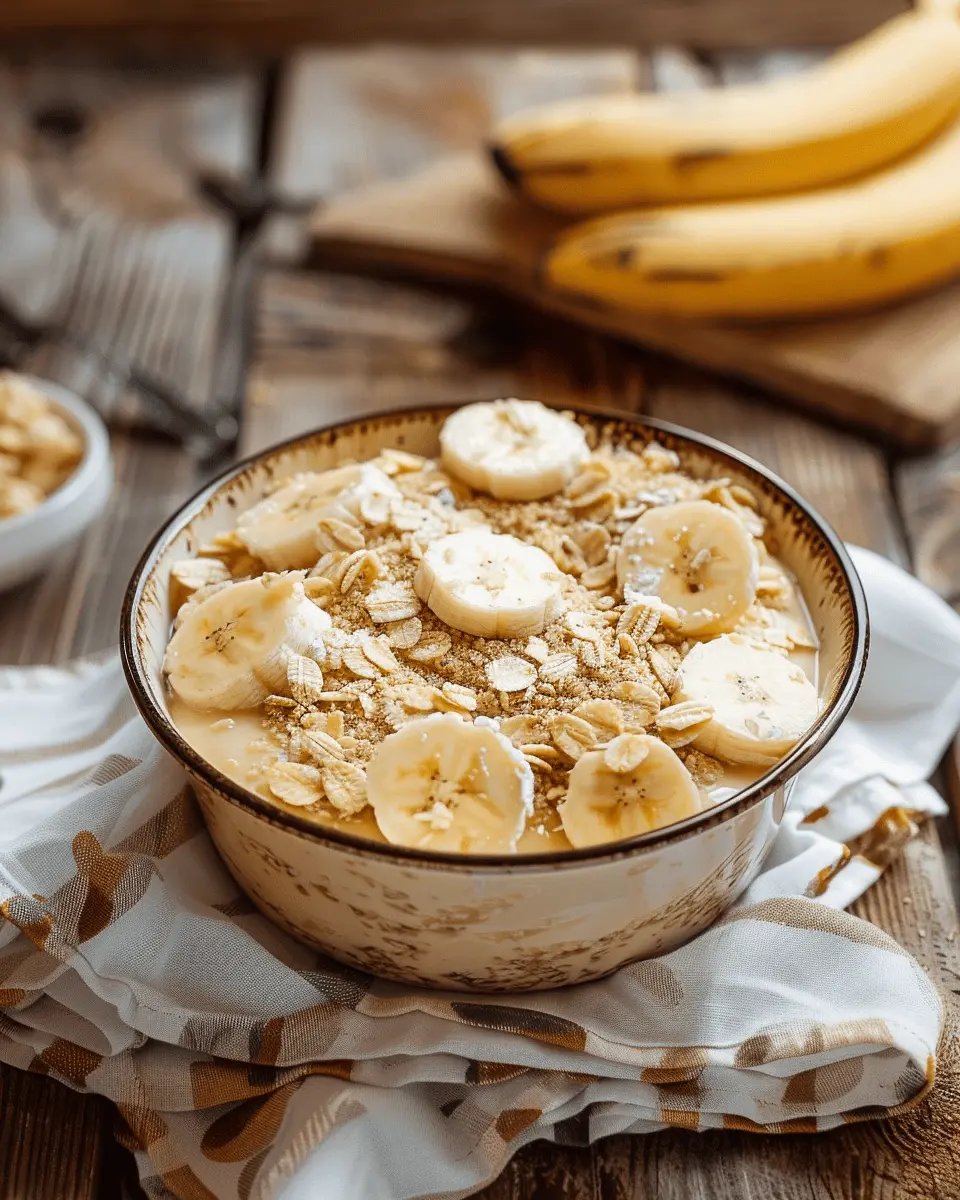
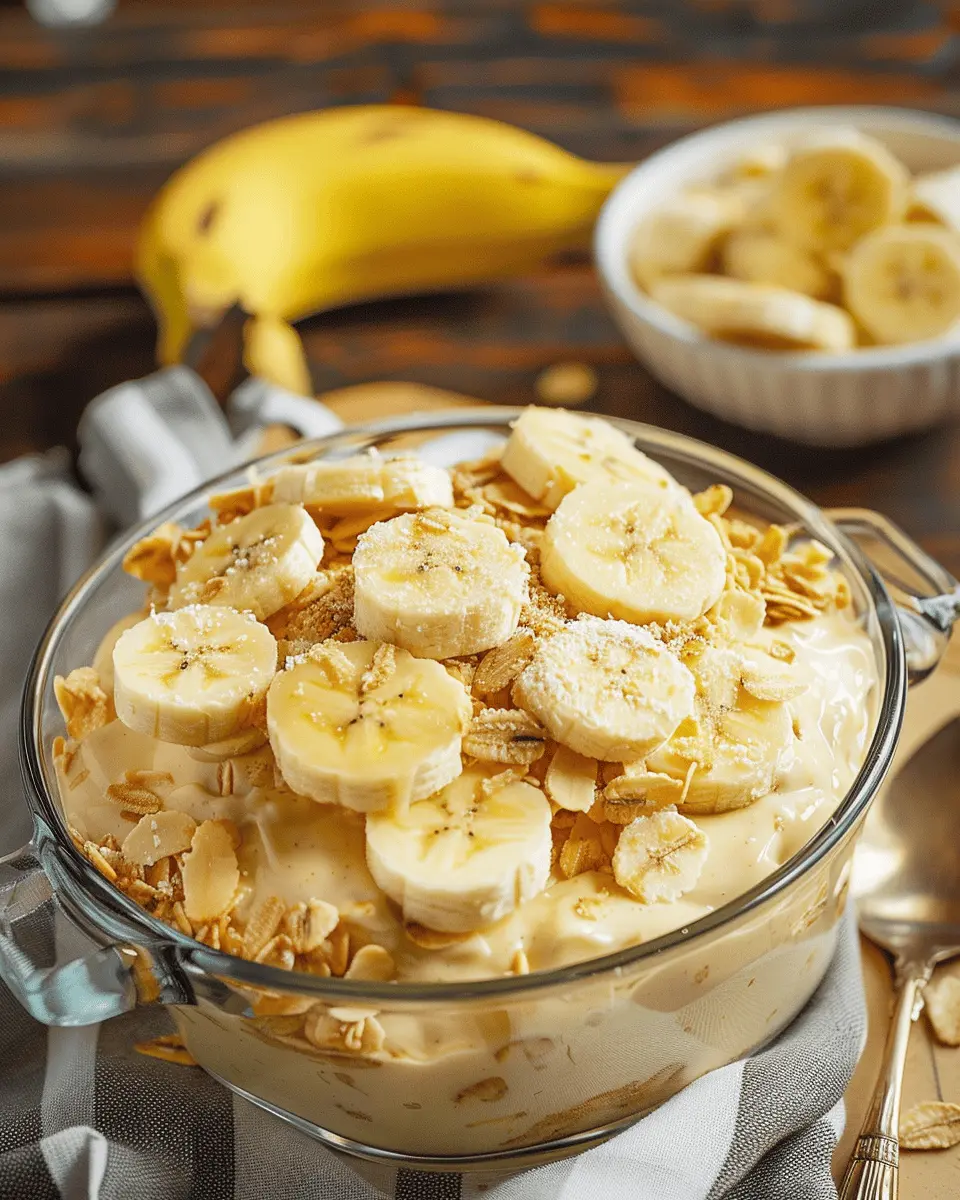
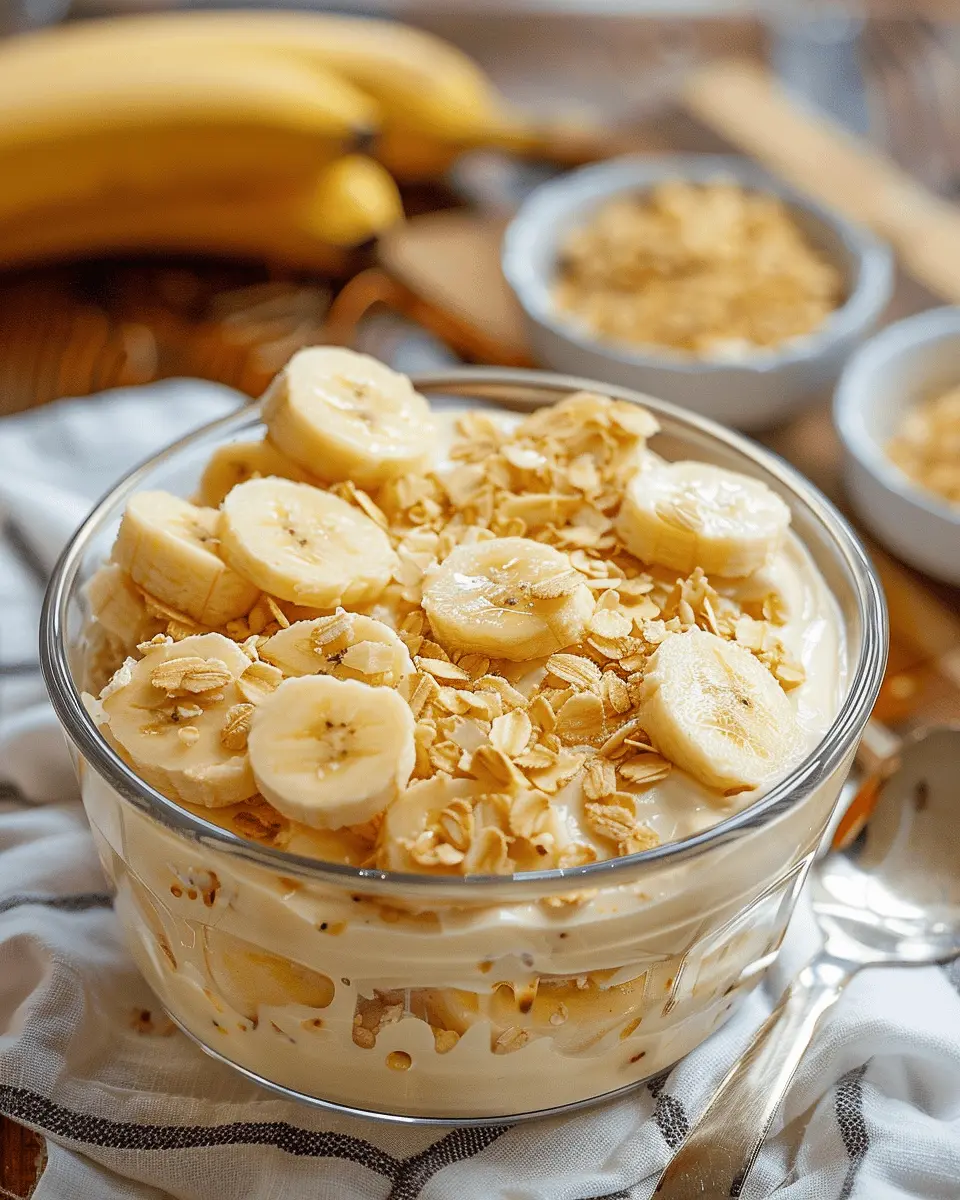
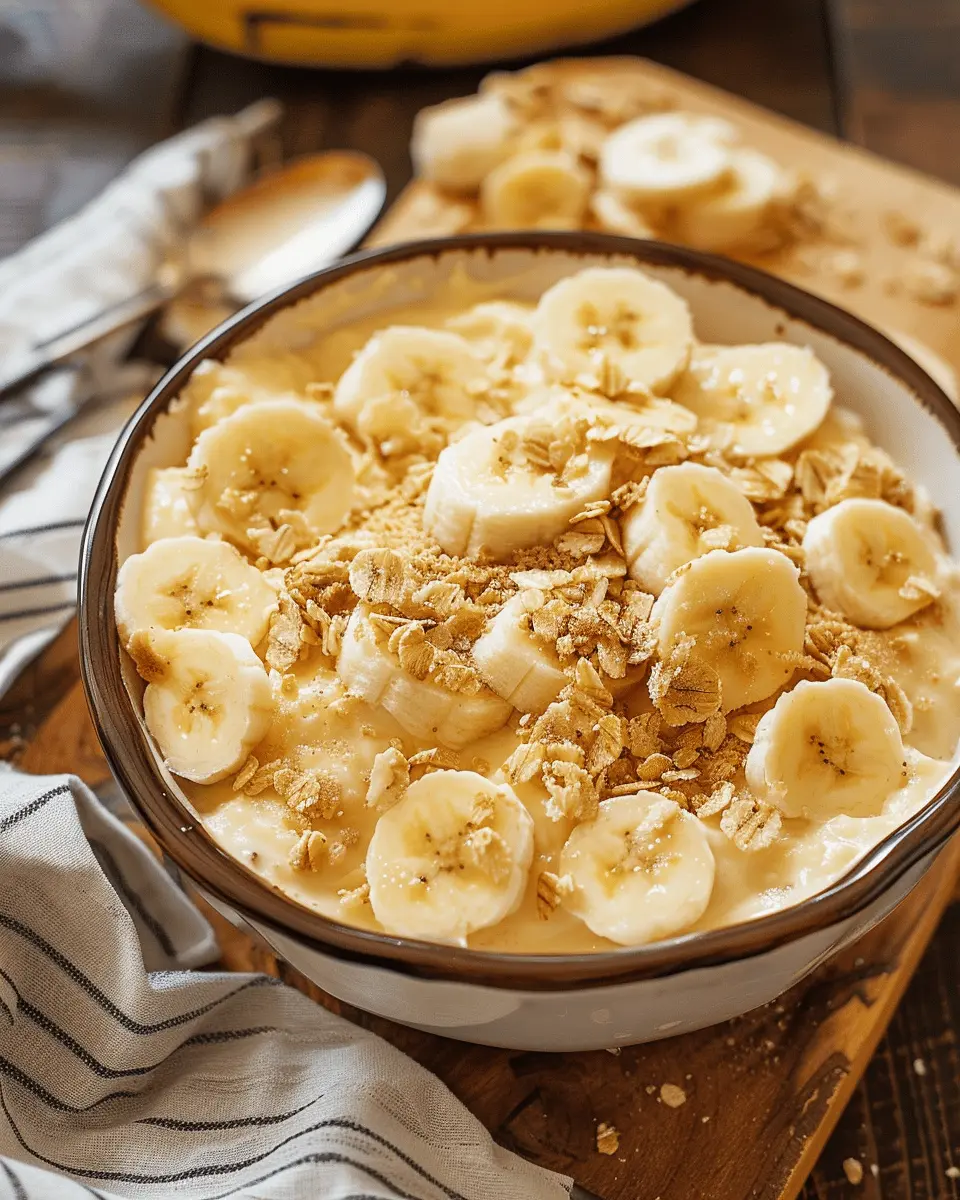
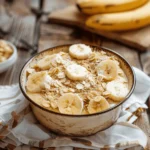
After your pudding has cooled for a bit, it’s time to layer! Start with a layer of vanilla wafers at the bottom of your serving dish. Next, slice your ripe bananas and layer them over the cookies. After the fruit is nestled in, pour a generous amount of that luscious pudding over the top. Repeat these layers until you reach the top of your dish, finishing with pudding.
Don’t forget, the classic texture of old-fashioned homemade banana pudding comes from those wonderful layers of crispy wafers and creamy pudding.
Top with Whipped Cream and Chill
Finally, it’s time to add a fluffy topping! Spread a thick layer of whipped cream over the top of the pudding. This not only adds a delightful texture but also creates an appealing presentation. Cover the dish with plastic wrap and refrigerate for at least four hours or, better yet, overnight. This chilling time allows the flavors to meld and the wafers to soften just perfectly.
When you’re ready to serve, enjoy the satisfaction of presenting this beautifully layered dessert! You can even add a few more sliced bananas on top for garnish.
Whether you’re entertaining or just treating yourself, this old-fashioned homemade banana pudding is sure to impress. Happy cooking!
Variations on Old-Fashioned Homemade Banana Pudding
Indulge in Chocolate Layers
If you’re a fan of the classic old-fashioned homemade banana pudding, why not take it up a notch with some chocolate layers? You can easily incorporate chocolate pudding between the layers of your vanilla pudding and bananas. Here’s how:
- Layering: Start with a layer of the traditional vanilla pudding. Then add a layer of rich chocolate pudding, followed by slices of fresh bananas. Repeat until you reach your desired height.
- Topping: Finish it off with crumbled chocolate wafers or crushed cookies for an extra crunch. Not only does this create a beautiful presentation, but the flavor combination of banana and chocolate is simply irresistible!
Curious about the benefits of chocolate? According to Healthline, dark chocolate is rich in antioxidants and can improve heart health—so you can indulge a little guilt-free!
Vegan Banana Pudding Alternatives
For those following a plant-based lifestyle, creating an old-fashioned homemade banana pudding can easily be done with a few simple swaps. Here’s a vegan-friendly version that retains all the creaminess and flavor:
- Milk Substitute: Use almond milk, coconut milk, or any preferred plant-based milk as your base. This gives you that creamy texture without dairy.
- Thickening Agent: Instead of traditional eggs, opt for cornstarch or a flaxseed meal mix (1 tablespoon flaxseed meal mixed with 2.5 tablespoons water for each egg) to help thicken the pudding.
- Sweetness: Consider using maple syrup or agave nectar to sweeten the mix naturally.
By exploring these variations, you’re not just making a dessert; you’re creating a unique experience that suits different palates and lifestyles. Feel free to experiment and find your ideal take on the classic!
Cooking Tips and Notes for Old-Fashioned Homemade Banana Pudding
Common Pitfalls to Avoid
Crafting the perfect old-fashioned homemade banana pudding can sometimes feel like a daunting task, but with a little know-how, you can avoid common mistakes.
-
Use Fresh Bananas: Overripe bananas can ruin the texture and flavor. Choose firm bananas for that classic sweetness and visual appeal.
-
Watch the Tempering: When you add hot milk to your egg mixture, do it slowly to avoid scrambling the eggs. This process, known as tempering, is key to a smooth custard.
-
Thickening Issues: If your pudding doesn’t thicken properly, it might be due to insufficient cooking time. Be patient! The mixture should bubble gently on the stove.
-
Layering: For the best presentation, layer your pudding with just the right amount of cookies. Too many can make it soggy; a balance will ensure that creamy and crunchy texture we all love.
For more tips on pudding perfection, check out sources like Serious Eats or America’s Test Kitchen.
Serving Suggestions for Old-Fashioned Homemade Banana Pudding
Presenting in Individual Cups
Serving your old-fashioned homemade banana pudding in individual cups not only adds an elegant touch but also makes for easy portion control. Use clear glass dessert cups or mason jars to showcase the beautiful layers of creamy pudding, fresh bananas, and vanilla wafers. This lets guests see the delightful texture before they even take a bite! Plus, they are perfect for that picnic in the park or a chic dinner party.
Creative Garnishing Ideas for a Photo-Worthy Dessert
A garnish can elevate your dessert from tasty to truly indulgent. Here are some ideas to make your banana pudding shine on the table—and in those Instagram photos:
- Whipped Cream Cloud: Top each cup with a generous dollop of homemade whipped cream.
- Banana Slices: Add fresh banana slices to the top for a pop of color and freshness.
- Mint Leaves: A sprig of mint can brighten up the presentation and add a touch of sophistication.
- Chocolate Shavings: For chocolate lovers, a sprinkle of dark chocolate shavings adds richness.
By focusing on these simple yet effective serving suggestions, you’ll create a delicious experience with your old-fashioned homemade banana pudding. For more entertaining ideas, check out resources like Food52 for inspiration!
Time Breakdown for Old-Fashioned Homemade Banana Pudding
When you’re ready to whip up some old-fashioned homemade banana pudding, it’s essential to plan your time wisely. Let’s break down the timing so you can enjoy the sweet process without feeling rushed!
Preparation Time
Gathering your ingredients and prepping everything will take about 20 minutes. This includes slicing ripe bananas and mixing together the base for your pudding. A little tip: having everything ready to go makes the cooking process smoother and more enjoyable!
Cooking Time
The actual cooking will take approximately 15-20 minutes. You’ll be whisking and stirring away, but trust me, it’s worth it for that creamy goodness. Make sure to stay attentive, so you can achieve that perfect texture.
Chilling Time
Once your pudding is cooked, the magic happens during the chilling time. Ideally, let it chill in the refrigerator for at least 2-4 hours. This step is crucial for allowing the flavors to meld beautifully—plus, it gives you time to plan the perfect way to serve your dessert. Whether you have friends over or just want a cozy night in, this chilled treat is bound to impress!
For more tips on timing and preparation, check out resources from Food Network and Serious Eats. Enjoy your banana pudding adventure!
Nutritional Facts for Old-Fashioned Homemade Banana Pudding
Calories per serving
When indulging in old-fashioned homemade banana pudding, each serving typically contains around 200–300 calories. The actual calorie count can vary based on portion sizes and specific ingredient choices, such as the type of milk or sugar you use. If you’re looking for a healthier twist, consider swapping out regular milk for a low-fat or plant-based alternative.
Key nutrients to consider
This delightful dessert not only satisfies your sweet tooth but also packs some nutritional benefits. Here’s what you might find in a serving:
- Carbohydrates: A good source of energy, largely from bananas and sugar.
- Fiber: Bananas contribute dietary fiber, which aids digestion.
- Vitamins: Rich in Vitamin C and B6, bananas can support overall health.
- Minerals: Provides potassium, essential for heart and muscle function.
For more accurate information or specific dietary needs, checking out resources like the USDA FoodData Central can be quite helpful. So, the next time you’re whipping up this classic treat, you can enjoy it guilt-free!
FAQs about Old-Fashioned Homemade Banana Pudding
Can I use frozen bananas for this recipe?
Using frozen bananas in your old-fashioned homemade banana pudding isn’t the best choice. While it might seem convenient, frozen bananas can become mushy when thawed, altering the texture of your pudding. Fresh, ripened bananas provide that perfect balance of creaminess and firmness that keeps the dessert delightful. Plus, fresh bananas ensure better flavor and sweetness—just look for bananas with a few brown spots for maximum taste!
How long does banana pudding last in the fridge?
Typically, homemade banana pudding can last about 3 to 4 days in the refrigerator. However, it’s vital to note that the bananas may start to brown and lose their texture as time goes on. To keep your pudding fresh, make sure it’s covered tightly to minimize exposure to air, which can speed up browning. If you want to extend its lifespan, consider consuming it within the first couple of days for peak flavor and Fresher texture. For detailed tips on food storage, check out the USDA’s guidelines here.
What’s the best way to prevent the bananas from browning?
To keep your bananas looking fresh and vibrant in your old-fashioned homemade banana pudding, there are a few nifty tricks you can employ:
- Lemon juice: Lightly coating the banana slices with lemon juice helps slow down the oxidation process, keeping them looking appetizing.
- Covering up: Make sure to layer your pudding tightly, as the more exposed the bananas are, the more likely they are to brown.
- Assemble just before serving: If possible, assemble your pudding right before you plan to serve it. This minimizes the time the bananas spend exposed to air.
By experimenting with these techniques, you’ll ensure your old-fashioned homemade banana pudding remains a visual and culinary delight!
Conclusion on Old-Fashioned Homemade Banana Pudding
Why this recipe will become a family favorite
There’s just something special about old-fashioned homemade banana pudding that makes it a timeless classic in any kitchen. Its creamy texture, delightful sweetness, and the freshness of ripe bananas create a nostalgic trip down memory lane. You might find your family gathering around the table for more than just dessert; they’ll be sharing stories and laughter, making memories that last.
This recipe is simple and satisfying, perfect for those weeknight dinners or special occasions. Your loved ones won’t be able to resist going back for seconds (or even thirds)! So, why not give it a try and see how this delightful treat can bring everyone closer?
For more dessert inspirations, check out Bon Appétit’s guide to desserts.
PrintOld-Fashioned Homemade Banana Pudding: A Delightful Classic Recipe
This classic homemade banana pudding is the perfect comfort dessert, embodying nostalgia and indulgence.
- Prep Time: 20 minutes
- Cook Time: 15 minutes
- Total Time: 3 hours 35 minutes
- Yield: 8 servings 1x
- Category: Desserts
- Method: Stovetop
- Cuisine: American
- Diet: Vegetarian
Ingredients
- 4 ripe bananas
- 1 box vanilla wafers
- 1 cup granulated sugar
- 1/3 cup all-purpose flour
- 1/4 teaspoon salt
- 4 large egg yolks
- 2 3/4 cups whole milk
- 1 teaspoon vanilla extract
- 1 tablespoon butter
Instructions
- In a saucepan, combine sugar, flour, and salt.
- In a separate bowl, whisk egg yolks and add milk gradually.
- Combine both mixtures in the saucepan and cook over medium heat until thickened.
- Remove from heat and stir in vanilla and butter.
- In a serving dish, layer vanilla wafers, banana slices, and pudding mixture.
- Repeat layers until ingredients are used up, finishing with pudding on top.
- Chill for several hours before serving.
Notes
- For best flavor, use ripe bananas.
- You can substitute homemade pudding with instant pudding if in a hurry.
Nutrition
- Serving Size: 1 cup
- Calories: 320
- Sugar: 15g
- Sodium: 150mg
- Fat: 12g
- Saturated Fat: 7g
- Unsaturated Fat: 3g
- Trans Fat: 0g
- Carbohydrates: 45g
- Fiber: 1g
- Protein: 5g
- Cholesterol: 140mg
Keywords: Old-Fashioned Homemade Banana Pudding, classic dessert, banana pudding recipe