Introduction to Zebra Cookies
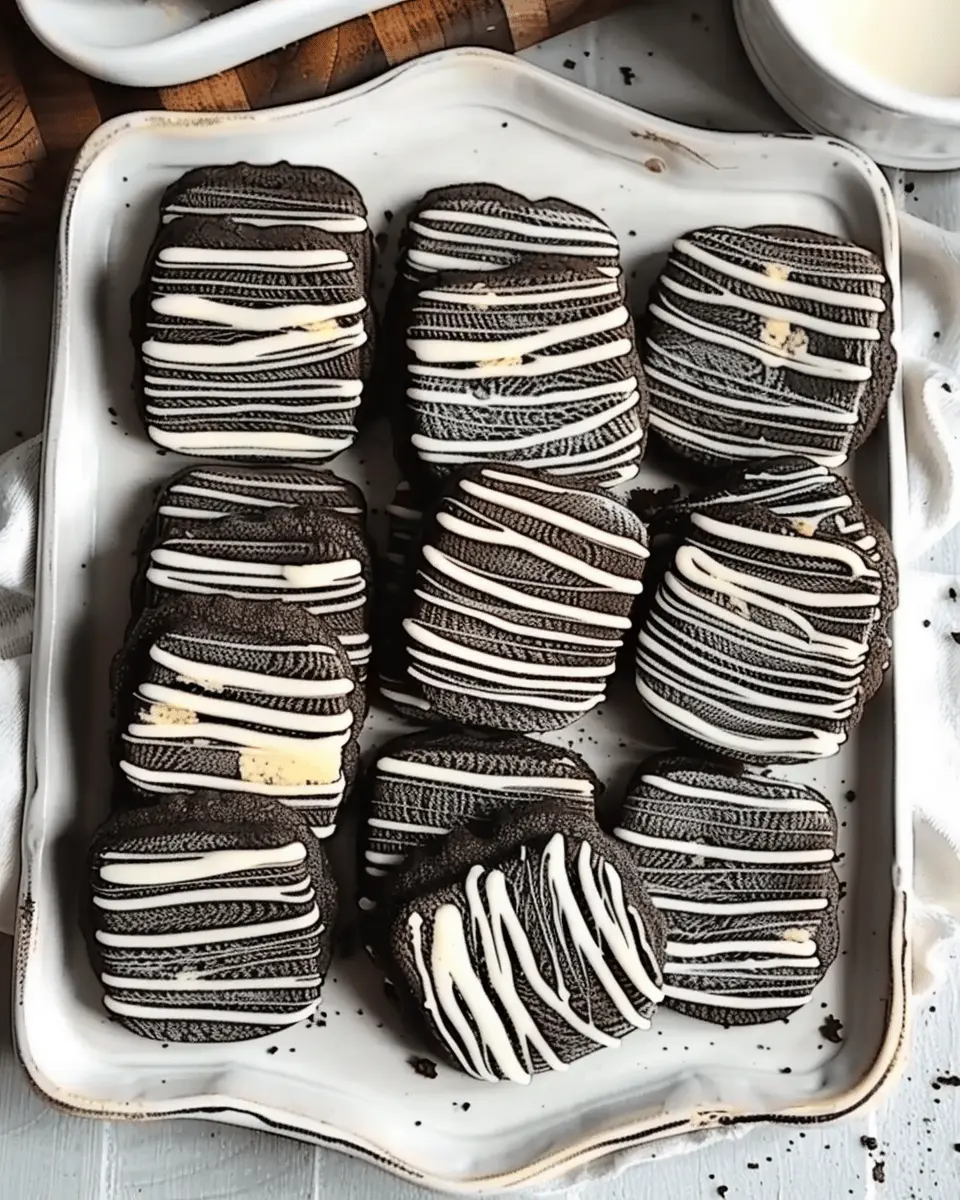
Zebra cookies, with their delightful swirling patterns of chocolate and vanilla dough, are not just a treat for your taste buds; they’re a feast for your eyes, too. Originating from the artful world of baking, these cookies bring a playful aesthetic to any dessert table. Wouldn’t you agree that a cookie that’s as fun to look at as it is to eat is a winner?
So, what makes zebra cookies utterly irresistible? The combination of rich chocolate and creamy vanilla flavors creates a harmonious balance that appeals to every palate. Imagine biting into a soft, chewy cookie that offers you the best of both worlds—why choose between chocolate and vanilla when you can have both in one bite? Let’s not forget the texture; the satisfying crunch on the outside gives way to a tender interior, creating a delightful contrast that keeps you reaching for more.
But the magic of zebra cookies doesn’t end with flavor. They are surprisingly easy to make at home! With just a handful of ingredients—flour, sugar, butter, eggs, cocoa powder, and vanilla extract—you can whip up a batch in no time. For a little inspiration, check out the “Baking Basics” section on King Arthur Baking for useful tips on working with doughs.
The Irresistible Appeal of Zebra Cookies
These cookies are perfect for any occasion, whether you’re hosting a cozy get-together or simply indulging yourself after a long week. Their eye-catching appearance makes them a fantastic choice for birthdays, potlucks, or holiday gatherings. Plus, they’re a wonderful way to impress friends and family with minimal effort!
Did you know that baked goods are often linked to feelings of nostalgia? For many, the smell of freshly baked cookies can stir fond memories of family gatherings or childhood treats. With a little extra time and creativity, you can create lasting memories with zebra cookies that outshine any store-bought confection.
In summary, if you’re looking for a cookie that combines beauty with brilliant flavor, look no further. The next time you find yourself in the kitchen, remember to give zebra cookies a try; you won’t be disappointed!
Ingredients for Zebra Cookies
When you’re in the mood for a delightful treat, preparing zebra cookies is an exciting adventure in your kitchen. To get started, let’s break down the essentials you’ll need to create these beautifully swirled delights.
Basic ingredients for the base dough
Creating the base dough is the first crucial step in making zebra cookies. Here’s what you’ll need:
- All-purpose flour: 2 ½ cups for a sturdy yet soft texture.
- Granulated sugar: 1 cup to sweeten the dough perfectly.
- Butter: 1 cup (softened) for that rich flavor.
- Eggs: 1 large for binding all the ingredients together.
- Baking powder: 1 teaspoon to give your cookies a lovely rise.
- Vanilla extract: 1 teaspoon for an aromatic sweetness.
These simple ingredients come together to create the perfect foundation for your zebra cookies.
Ingredients for the chocolate swirl
The chocolate swirl is what gives these cookies their classic zebra appearance. Here’s what you need:
- Unsweetened cocoa powder: ⅓ cup to create that rich, chocolaty flavor.
- Extra sugar: Just a touch (around ¼ cup) to balance the cocoa’s bitterness.
- Water or milk: A couple of tablespoons to mix with the cocoa powder and create a smooth consistency.
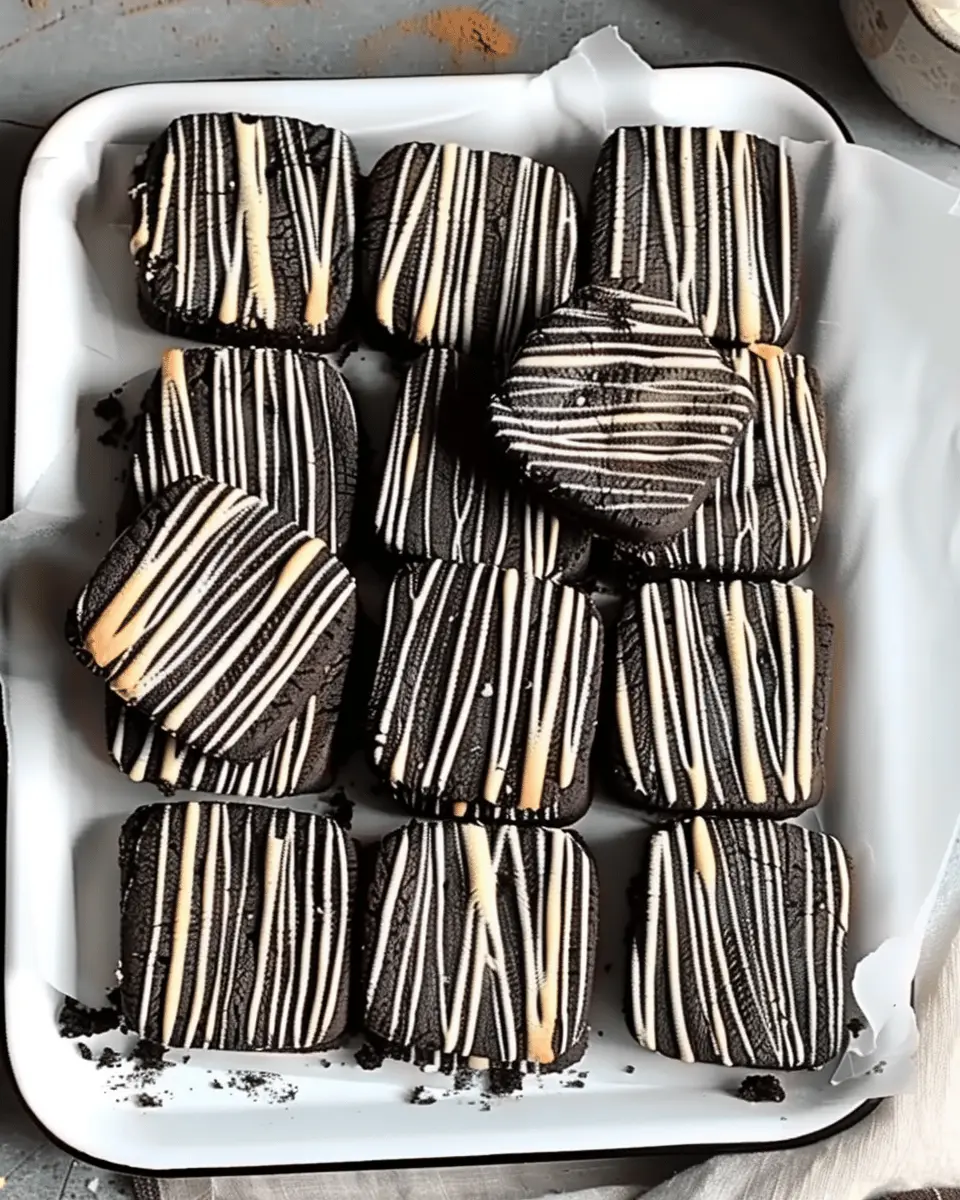
Mixing these ingredients will lead to the gorgeous marbling that makes zebra cookies so visually appealing and delicious.
For tips on how to measure ingredients accurately, check out resources from King Arthur Baking Company. Happy baking!
Preparing Zebra Cookies
Baking can feel like an art form—especially when you’re creating stunning zebra cookies that will impress any crowd. Follow this friendly guide to prepare these delightful treats, and soon enough, you’ll be basking in the sweet aroma of freshly baked cookies.
Gather your ingredients
Before diving into the baking process, it’s essential to gather all your ingredients. This way, you won’t find yourself rummaging through your pantry when you should be mixing those sweet, buttery cookie batters. Here’s what you’ll need:
-
For the vanilla dough:
-
1 cup unsalted butter, softened
-
1 cup granulated sugar
-
1 large egg
-
2 teaspoons vanilla extract
-
2 ½ cups all-purpose flour
-
1 teaspoon baking powder
-
A pinch of salt
-
For the chocolate batter:
-
½ cup unsweetened cocoa powder
-
1/3 cup powdered sugar
-
2 tablespoons milk (or plant-based milk)
-
1 teaspoon vanilla extract
Gathering these ingredients ahead of time will help streamline your cookie-making process. As an added tip, always double-check your pantry for baking supplies. It’s easy to forget the little things, like baking powder, that can make or break your cookies!
Prepare the cookie dough
Start by creaming together the softened butter and granulated sugar in a large mixing bowl until it’s light and fluffy. I find this step oddly satisfying—there’s something about the transformation of those ingredients that just feels magical.
Once the butter and sugar are well combined, add the egg and vanilla extract. Mix just until incorporated, then sift together the flour, baking powder, and salt in a separate bowl. Gradually add this dry mixture to the wet ingredients, stirring until the dough forms and comes together. Here’s a pro-tip: If your dough feels a bit crumbly, don’t hesitate to add a tiny splash of milk to bring it together.
Make the chocolate batter
Now, let’s add that luscious chocolate flavor! In a different bowl, combine the cocoa powder, powdered sugar, and the remaining wet ingredients: milk and vanilla extract. Mix thoroughly until a smooth batter forms. This chocolate layer will be the perfect contrast to the vanilla in your zebra cookies. Remember, the key is balancing flavors, so feel free to taste as you go!
Combine the doughs for that zebra effect
This is where the fun begins. Take a small portion of your vanilla dough and the chocolate batter. Roll both out into 1/4 inch thick sheets. You can use parchment paper to keep them from sticking. Now, the real magic happens: lay one sheet on top of the other and gently press them together.
Next, roll everything into a log, wrapping it tightly in plastic wrap. This step is crucial for achieving that iconic zebra pattern. Refrigerate the log for about an hour until it’s firm enough to slice.
Shape and arrange the cookies
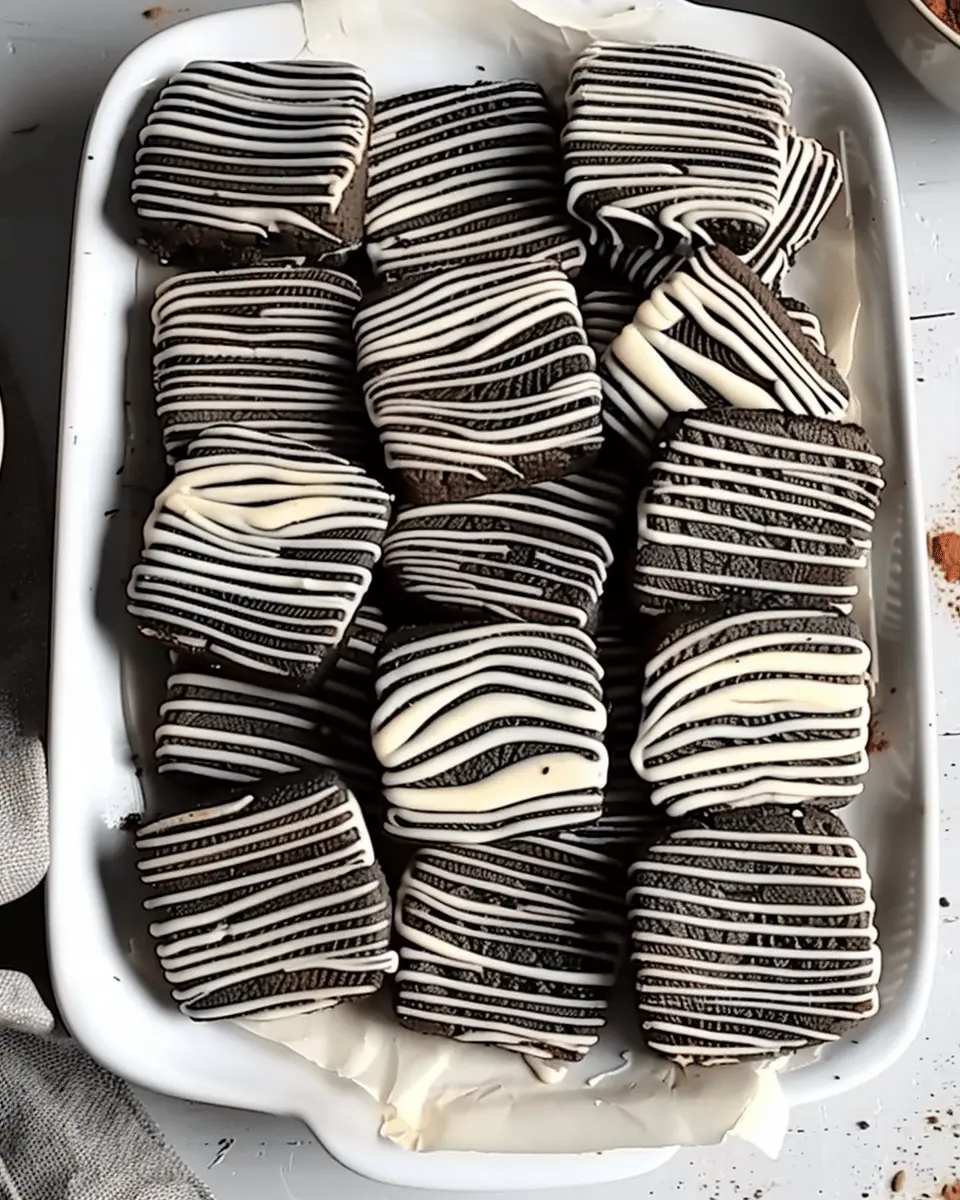
Once chilled, remove the dough from the refrigerator and slice it into equal rounds—about 1/4-inch thick. As you do this, marvel at how the cookie slices have that stunning zebra effect! Place them on a baking sheet lined with parchment paper, allowing some space for spreading, as these cookies will puff up nicely when baked.
Bake the zebra cookies
Finally, it’s baking time! Preheat your oven to 350°F (175°C). Now, place the cookies in the oven and let them bake for about 10-12 minutes or until the edges are lightly golden. The smell of baked cookies will fill your kitchen, and trust me, your anticipation will hit an all-time high.
Once baked, allow the cookies to cool on a wire rack. Enjoy these uniquely patterned zebra cookies with a glass of milk or your favorite hot beverage. The delightful combination of vanilla and chocolate makes these treats irresistible. So, what are you waiting for? Get those ingredients ready and let the baking begin!
Variations on Zebra Cookies
Zebra cookies are a delightful classic that can easily lend themselves to various adaptations. Whether you’re experimenting for dietary needs or just want to try something a little different, these variations are sure to impress.
Nutty Zebra Cookies
If you’re a fan of crunchy textures, consider adding nuts to your zebra cookies. Chopped walnuts or pecans complement the rich chocolate and sweet vanilla flavors beautifully. Simply fold in about 1/2 cup of your favorite nuts into the dough before chilling. Some even love to top the glazed cookies with crushed nuts for an extra crunch and visual appeal. Not only do they add flavor, but nuts also bring a nice nutritional boost, providing healthy fats and protein.
Gluten-Free Zebra Cookies
For those who are health-conscious or have dietary restrictions, creating gluten-free zebra cookies is a breeze. Substitute all-purpose flour with a gluten-free blend or almond flour. You might also want to check out expert resources like Celiac Disease Foundation for guidance on gluten-free baking tips. Ensure that all your ingredients are certified gluten-free to avoid any cross-contamination. The result? Deliciously tender cookies that everyone can enjoy.
Vegan Zebra Cookies
Want to make the perfect vegan zebra cookies? It’s easier than you might think! Replace dairy butter with coconut oil or vegan butter, and swap out eggs for flaxseed meal or applesauce. Using plant-based chocolate can easily give you the same great taste while keeping things cruelty-free. Imagine popping those gorgeous, swirled cookies into your event; they would wow any crowd while supporting a more sustainable lifestyle.
Whichever variation you choose, zebra cookies are more than just a treat. They’re a canvas for creativity and a delicious way to connect with friends and family over baked goodness!
Baking notes for Zebra Cookies
Common pitfalls to avoid
When crafting your zebra cookies, here are a few common missteps you’ll want to steer clear of:
- Overmixing the dough: This can lead to tough cookies rather than the tender texture that we all love. Mix just until combined.
- Incorrect oven temperature: An oven thermometer could be your best friend here. Too hot or too cold can dramatically affect how your cookies bake.
- Failing to chill the dough: Chilling helps the cookies maintain their shape, so don’t skip this step for neat, beautiful stripes.
Storage tips for fresh cookies
To keep your zebra cookies fresh and delicious:
- Cool completely before storing: This prevents them from becoming soggy.
- Use an airtight container: This will help maintain their texture. You might consider layering them with parchment paper to avoid sticking.
- Freezing for longer storage: If you don’t plan to eat them within a week, these cookies freeze beautifully! Just wrap them well in plastic wrap and place them in a freezer-safe bag.
For a deeper dive into cookie techniques, check out King Arthur Baking’s tips for perfect results.
Serving suggestions for Zebra Cookies
Pairing Your Zebra Cookies with Drinks
When it comes to enjoying zebra cookies, the right drink can enhance your experience. For a refreshing contrast, consider pairing your cookies with a warm cup of coffee or tea. The rich flavors of black coffee or a smooth chai latte balance wonderfully with the sweet and chocolatey taste of the cookies. If you’re in the mood for something fruity, a glass of iced lemonade or sparkling water with a hint of mint can be a delightful choice. Not only do these beverages complement the sweet profile of the cookies, but they also provide a refreshing palate cleanser between bites.
Creative Ways to Present Your Cookies
Presentation can turn a simple treat into an unforgettable experience. Arrange your zebra cookies on a vibrant platter or cake stand, and consider adding some fresh berries or nuts around them for a colorful touch. For a fun twist, stack them in a mason jar tied with a festive ribbon—perfect for gifting! If you’re hosting a gathering, why not create a dessert bar? Display your cookies alongside various toppings, such as sprinkles or coconut flakes, and let guests customize their own treats. These small touches not only appeal visually but also make sharing your zebra cookies a memorable occasion.
For more serving ideas, check out Food Network and their dessert presentation tips!
Time details for Zebra Cookies
Preparation time
Making zebra cookies is an enjoyable process that starts with a little prep work. You’ll need about 30 minutes to gather your ingredients, mix the dough, and shape it into logs. Depending on your baking experience, this could also be a fun time to squeeze in some tunes or a podcast!
Baking time
The actual baking process takes around 12 to 15 minutes. Make sure to keep a close eye on them in those last few minutes—nobody likes an over-baked cookie!
Total time
In total, you’re looking at roughly 45 minutes to whip up a batch of these delightful cookies. They’re perfect for sharing or just treating yourself after a busy day. Why not check out some tips for perfecting your baking skills on The Kitchn while you’re at it? Happy baking!
Nutritional information for Zebra Cookies
When you’re indulging in zebra cookies, it’s good to know what you’re putting into your body. Let’s break down the nutrition facts to enjoy these delightful treats while staying informed.
Calories
A single zebra cookie typically contains around 150–200 calories. That makes it a sweet but not overly guilt-inducing snack, perfect for an afternoon pick-me-up or dessert after dinner.
Sugar content
Sugar content can vary widely depending on the recipe, but you can expect about 10–12 grams of sugar in each cookie. While it’s tempting to cut down on sugar for health, a small indulgence can be part of a balanced diet. For specific tips on reducing sugar, check out this guide from the American Heart Association.
Fats
In terms of fats, each zebra cookie generally contains 7–9 grams of fat. Most of this comes from butter, but you can swap for healthier alternatives if desired. Remember, not all fats are created equal; opt for healthier fats, like those found in cooking oils, when you can. For more healthy fat options, explore resources like the Harvard T.H. Chan School of Public Health.
Enjoy your zebra cookies with the knowledge that you’re treating yourself right!
FAQs about Zebra Cookies
How can I make my zebra cookies more flavorful?
To elevate the flavor profile of your zebra cookies, consider adding a splash of vanilla or almond extract to the dough. These extracts not only enhance sweetness but also introduce a warm aroma that complements the chocolate beautifully. If you’re feeling adventurous, throw in some finely chopped nuts or even a dash of espresso powder for a subtle coffee kick.
Also, think about incorporating different types of chocolate! For a twist, try using white chocolate chips or even a swirl of peanut butter chocolate. The more layers of flavor, the more exciting your zebra cookies will be! For tips on flavor pairing, check out this fine chocolate guide.
What is the best way to store zebra cookies?
Storing your zebra cookies properly can ensure they stay fresh for longer. Place them in an airtight container at room temperature, separating the layers with parchment paper to prevent them from sticking together. If you live in a humid climate, consider refrigerating them, as that will help maintain their texture.
Can I freeze zebra cookies?
Absolutely! Freezing zebra cookies is a fantastic way to preserve their deliciousness. To do this, place them in a single layer on a baking sheet and freeze until solid. Then, transfer them to a freezer-safe bag or container, separating layers with parchment paper. They can be stored for up to three months. When you’re ready to enjoy, just let them thaw at room temperature for a few minutes.
With these tips in hand, you’re all set to create and enjoy your delightful zebra cookies any time!
Conclusion on Zebra Cookies
Why you should try making zebra cookies at home
Incorporating zebra cookies into your baking repertoire is not only a delicious decision, but it’s also a fun and engaging experience. The combination of rich chocolate and creamy vanilla flavors creates an eye-catching treat that impresses family and friends alike.
Here are a few reasons why you should whip up these delightful cookies:
- Simple ingredients: Most of the items are kitchen staples.
- Versatile serving: Perfect for celebrations or a sweet snack during your work-from-home break.
- Great for bonding: Involve kids or roommates for a fun baking adventure.
Feeling inspired? Dive into the world of zebra cookies and satisfy your sweet cravings while honing your culinary skills. This recipe is sure to become a favorite, and who knows, it might just spark a new tradition! For more inspiration, check out resources from King Arthur Baking and BBC Good Food.
PrintZebra Cookies: Easy Recipe for Deliciously Irresistible Treats
A delightful recipe for zebra cookies that combines chocolate and vanilla dough for a visually appealing treat.
- Prep Time: 20 minutes
- Cook Time: 12 minutes
- Total Time: 32 minutes
- Yield: 24 cookies 1x
- Category: Dessert
- Method: Baking
- Cuisine: American
- Diet: Vegetarian
Ingredients
- 1 cup unsalted butter
- 1 cup granulated sugar
- 2 large eggs
- 1 teaspoon vanilla extract
- 3 cups all-purpose flour
- 1 teaspoon baking powder
- 1/2 teaspoon salt
- 1/4 cup cocoa powder
Instructions
- Preheat your oven to 350°F (175°C).
- In a bowl, cream together the butter and sugar until fluffy.
- Add the eggs one at a time, then stir in the vanilla.
- In another bowl, mix the flour, baking powder, and salt.
- Gradually add the dry ingredients to the butter mixture.
- Divide the dough in half and mix cocoa powder into one half.
- Roll out each dough between parchment paper, then layer them alternately.
- Cut into desired shapes and place on a baking sheet.
- Bake for 10-12 minutes or until lightly golden.
- Let them cool before serving.
Notes
- Chilling the dough helps with rolling.
- For enhanced flavor, consider adding chocolate chips.
Nutrition
- Serving Size: 1 cookie
- Calories: 150
- Sugar: 10g
- Sodium: 75mg
- Fat: 8g
- Saturated Fat: 5g
- Unsaturated Fat: 2g
- Trans Fat: 0g
- Carbohydrates: 18g
- Fiber: 1g
- Protein: 2g
- Cholesterol: 30mg
Keywords: Zebra Cookies, cookies, dessert, baking